
It’s been almost three years, and Violin #9 has been dressed and played. I am very pleased with the sound. It is very similar to my #5, which I have always considered my favourite and best instrument.


Geigenbau Federer – Federer Violins
Federer Violins Website
It’s been almost three years, and Violin #9 has been dressed and played. I am very pleased with the sound. It is very similar to my #5, which I have always considered my favourite and best instrument.

I had no intention of working on the fiddle today, but it was sitting there looking neglected. An hour later with a riffler, finger plane, detail carving chisel, machinist’s files, and sandpaper, it’s done in the first pass.
Like the rest of the instrument, the heel is asymmetrical. I’ll do a bit of refinement before moving on to the fingerboard, nut, and saddle.


After many trial assemblies, the actual glue-up was anticlimactic. All alignments were right on. I left everything clamped overnight and re-checked alignments. Everything is still spot on, in all three dimensions. The only thing slightly off is the lateral alignment. The neck is slightly to the right of the ideal centreline. It only shows on the button. When I’m carving back the heel I should be able to disguise the misalignment.

This is process I’ve been delaying and slightly dreading. Accuracy is paramount here, in 2 axes. I’m doing less than a millimetre at a time. So far I’ve not cut where I shouldn’t, including in my hands. The Lee Valley Veritas miniature chisels simplify this detailed process.


Procrastination is such a pernicious thing! Most days I can look at the fiddle parts in process and ignore them. But some days I need to take a part in hand and do something. With several other projects now done or in hiatus, I picked up the neck a few days ago. Yesterday and today I got some significant work done.
The scroll and pegbox turned out quite nicely. As always, there’s the concern of breaking through while chopping out the peg box, but I was ultra-cautious in drilling the pilot holes and everything worked fine.
Next is to cut the mortise and tenon to mate the neck to the carcass.

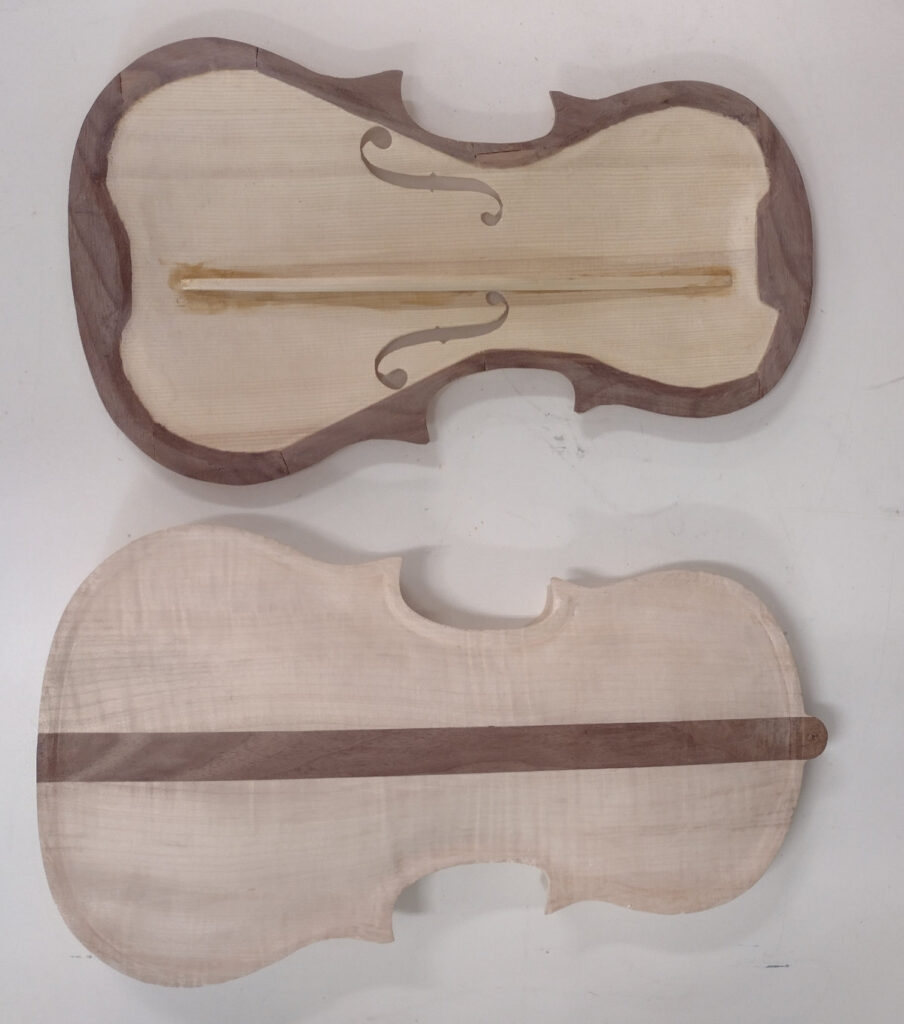
The Walnut strips fit very well, but were much wider than commercial purfling. It took a while, working with finger planes, scrapers, and sandpaper, to work them flush. The profile is now smooth as well.

Well, I was right – the back grooves took almost two hours to finish by hand. Some time ago I had thicknessed two strips of Walnut for the purfling. Today I slit one of them into five sections. My plan is to use solid Walnut for the purfling instead of the traditional three-layer black-white-black purfling.
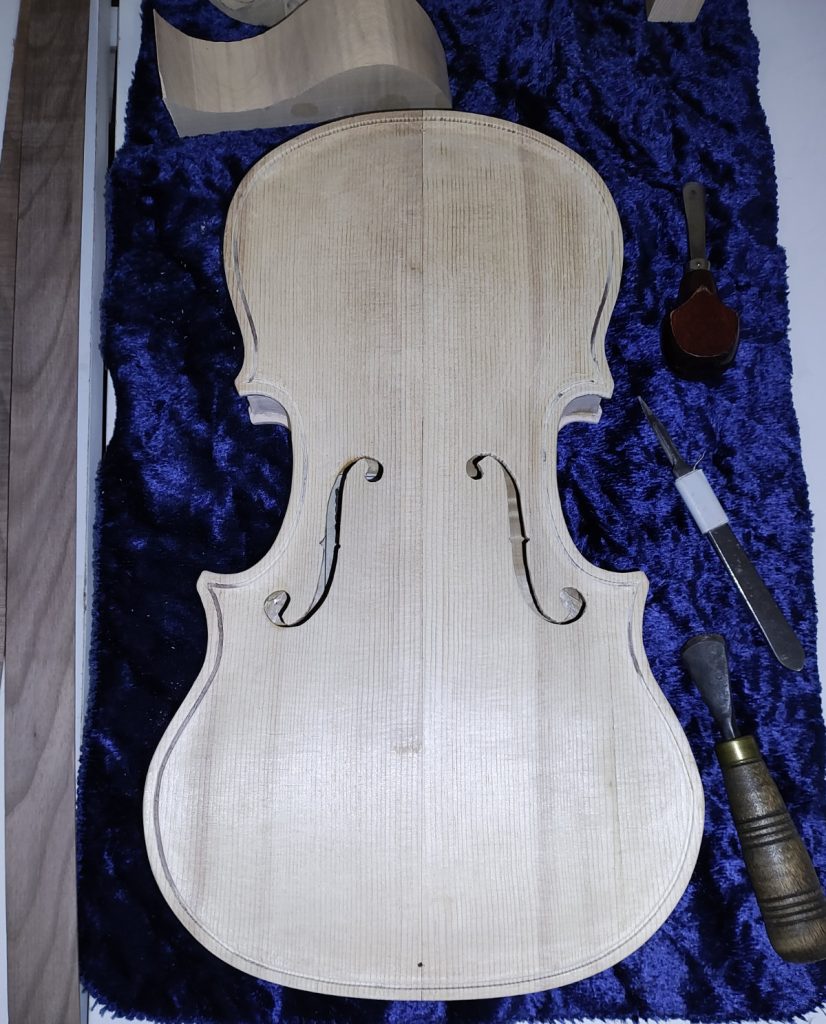
This is the year that #9 will be completed! The body has been sitting on my bench, looking at me with a reproachful attitude. A couple of days ago I routed the purfling grooves, this afternoon I cleaned up the ones on the top of the body. That’s the easier plate done. I expect that cleaning up the ones on the back plate, which is Maple and Walnut, will take much longer.

This morning I trimmed the belly plate to a profile better matching the installed ribs. I had originally planned to trim it with a guided router bit. I even drove to Lee Valley to pick one up that I thought would do the job. Unfortunately the top bearing mounting is completely different from the other bearing bits that I have. Finally I decided to just do it with a sanding drum on the drill press. That took only a few minutes. Lesson learned: sometimes the simple and obvious answer is the best.
A few days ago I had drilled alignment holes and made brass pins to fit. They’ll need to be trimmed to length, but I think they’ll be a nice touch in place of the usual ebony ones. Another unconventional thing was to apply a layer of Livos finishing oil to the inside surfaces. Finishing techniques have come a long way since the days of Stradivarius and Guarneri.
Open time is usually a problem with hide glue. Even working as quickly as possible, it starts to set up by the time the clamps are on. I’ll take off the clamps tomorrow and see if I got everything adhered properly.
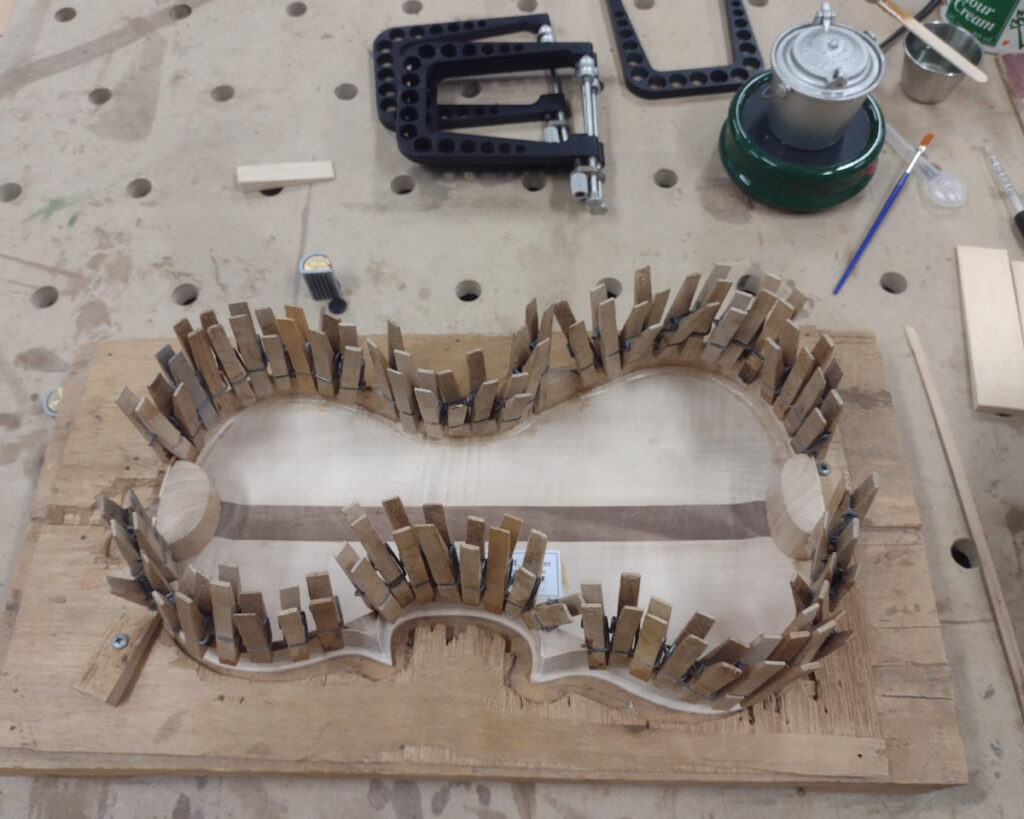
My original plan for this instrument was to eliminate the use of glued-in linings and machine shoulders with grooves directly into the plates. That worked fine for the bottom plate. Unfortunately the ribs aren’t all exactly perpendicular, so there is some minor variation in the profile where it was intended to fit into the grooves in the belly plate.
My solution was to plane off the shoulders, glue linings onto the ribs, and assemble in the traditional way. Unfortunately (there’s that word again!) that left shallow grooves visible, since I had machined the groove slightly below the plate inside. By the time I had sanded that all flat, the plate edge was under 2 mm. My solution was to apply a Walnut shim all around. Yes, it increases the weight. The belly plate weight went from 81 g to 99 g. But that’s with the Bass Bar in place in the latter measurement, so the wight gain was less than I had feared.
The tap tones stayed pretty much the same as before: Mode 5 at 349 Hz (F4) and Mode 2 at 152 Hz (D#3).
The linings are glued to the tops of the ribs. The alignment pin holes are drilled. I just need a router bit with a top bearing so I can trim the belly plate to the same profile as the ribs. Most of the perimeter is fine, but the C Bout areas have a bit of excess plate showing. I could sand it back manually, but a guided router bit will hopefully do a cleaner and more consistent job.